Once your content group has been created, you will be navigated to the “Fields” tab, here you can set up the format for your content group.
By default, a field labelled “Title” is added, and is required for each content group item.
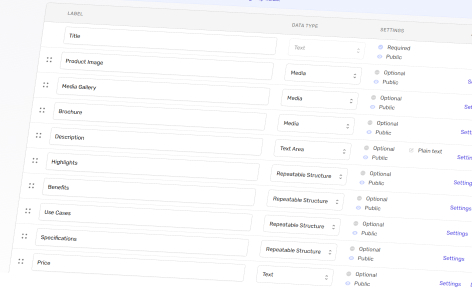
Adding New Content Group Fields
- In the top right hand corner of the screen, select “Add a new field”;
- Add an appropriate label (e.g. Product Description);
- From the dropdown, select an appropriate data type (e.g. Text Area). A full list of these data type fields is below;
- Set if this field is required or not;
- Set the options (using the cog icon);
A full list of these options is below; - Save your content group field setup by clicking “Save” in the top-left hand corner.
Data Type Fields
These are the data type fields available within a content group.
| Data Type | Description | Example Use Cases | Options |
|---|---|---|---|
| Text | A simple one line text input |
|
|
| Text Area | A larger text area for longer form text |
|
|
| Content | Select from related items from either the same, or other content groups |
|
|
| Media | Media items from your media library or add new ones |
|
|
| Tags* | Add tags to your content group item to help with filtering |
|
|
| Structure | Repeatable structure using a Title, Text, Media format |
|
|
| Link | Links to other resources |
|
|
* You can only have one field for “Tags”, but you can have many tags from many categories in this one field.
Recommended Workflow
Please note that once a content group has been populated, you cannot edit the fields used, so this a recommended workflow:
- Create your content group fields;
- Create a test item in your content group;
- Ensure that your content group fields match your needs;
- Delete your test item;
- Modify your fields accordingly;
- Repeat steps 2 to 5 until you are happy with your content group fields.